- TOSIZE.cz
- Do it yourself
- DIY Projects
A new model railway, by Reinder


Create this project yourself with sheet material cut to size by TOSIZE.cz!
Reinder
Above average
15 minutes
For a new model railway project, I was looking for a good construction method. After some research, I decided to build a layout in module form. This has the big advantage that it can easily be dismantled should this be necessary for a move or perhaps a model railway exhibition.
Determining the construction method
But how does that work? What type of wood do you use? Based on this article, I will take you through my way of building a sturdy but lightweight module layout.
Dimensions and planning
You can make a module in a fixed shape of, say, 100cm by 50cm but this is not always the best choice. If you have a modest track plan it is usually possible to make a model railway on this size of modules. If, like me, you have a more elaborate plan then it is better to adapt the modules to your track plan. It is therefore best to start by making a layout plan and work it out as precisely as possible. This can be done on paper but it is better to do it in a drawing program such as www.anyrail.com. I have been using this myself for years and am very satisfied with it. You can neatly work everything out to centimetre accuracy so you know exactly how to make the modules.
As you can see, this is my worked-out layout plan. When determining the modules, it is important that the points are not on the edges between the modules. Once you are satisfied with your layout plan then you can determine the modules. As you can see in the layout plan, there are different modules, here there are both large and small modules. Once you have determined the size of each module, it is time to order the wood.
Choice of materials
Here, I chose TOSIZE.cz. You can have many types of wood cut to size down to the millimetre here. Maybe even the selection is a bit overwhelming when you first come to the website. But for modules, we actually always use Plywood. MDF could also be used but this is actually too heavy and you have to wear a mouth mask if you cut into it yourself. I myself chose Poplar Plywood, which is a light but sturdy type of wood. You will notice when you use it yourself what a fine type of wood it is. After all, you want the modules to be light and not have to lift a module with two men.
Important for the Modules is that you calculate everything in advance, Make a list for this on paper or in Excel. Each module consists of:
- 2 Long sides
- 2 ends
- Min 1 intermediate piece depending on the length of the modules
The long sides have the length of the module and the other pieces have the length of the depth of your module minus 2x the thickness of the sides.
Example:
A 100x50cm module has:
- 1x table top 200x50 9mm
- 2 long side 100x8 12mm
- 2 end 47.6x8 12mm
- 1 spacer 47.6x8 12mm
Here, as I make it myself, I did the top from 9mm thick Poplar Plywood and the frame of the module from 12mm. Of course, your module could have a different shape but this works the same way. You can then even have the sides cut at an angle so that a triangular module fits neatly together.
You should then have a number of lists, each representing a module. It is important to give everything a name. Once you have checked everything again, you can start ordering. On the website you can easily search for sheet material and then choose Populieren Multiplex. When entering the dimensions, make sure you finish everything neatly per module. This gives a neat overview in the shopping basket, which lists everything neatly for you. Do not forget to give everything a name. This makes it clear in the shopping basket and when everything is nicely packaged and delivered to your home, it makes picking everything out a lot easier. This is because they put those nice stickers on it that show your entered details and so you know exactly which shelf is what. This is also a big advantage of TOSIZE.cz. Everything is neatly packaged and delivered to your home within a few days. The only thing left to do then is to sort everything out neatly and put it together yourself. And if you fill in everything neatly, this is a snap.
Construction Modules
Put all modules neatly together.
What do we need:
- A cordless drill (with full battery)
- T-square
- Corner clamp (min. 2)
- Workbench (floor is of course also possible but more awkward)
- Spirit level
- Wood drill 8mm
- Wood drill bit 6mm
- Wood drill bit 3/4mm (for pre-drilling)
- Good flat-head screws (preferably Torx with wood-to-wood connection where the top part of the screw is smooth)
- Torx flat-head screws 30 mm for fastening table top
- M8 40mm bolts for connecting modules incl. nut/swing nut
- M8 washers (2 per bolt)
- M6 40mm bolts for fixing legs incl. nut/swing nut
- M6 washers (2 per bolt)
- Coffee
Once you've packed everything, it's time to get started. The important thing is that you assemble the modules calmly and systematically. I start with the 2 long sides and 1 end side. Secure all three pieces tightly with the corner clamps, I use 4 of them myself, 2 at the top and 2 at the bottom so the boards are nicely aligned. Once you are sure they are in place, you can pre-drill 4 holes with the small drill bit. You don't need to pre-drill but this is recommended because then you are much less likely to split your wood. If you use the same screws as I did, you will see that the screws tighten up nicely.
When you have finished one side, do the other side and you will have a nice rectangle. Depending on what you are going to do on the module, you can also fix the board in the middle at this point with 2 clamps as you can see in the picture below.
If you have a module with many turnouts, it would be wise not to do this yet and only place the board once you have placed all turnouts incl. motors. Otherwise there is a good chance it will be in the way and you will have to move it again afterwards. Besides, it is more convenient because you can make extra holes or a notch where the wires can run through if necessary. Now you have finished the first frame and can move on to the next. It is tempting to assemble the tabletop right away, but it is better to do that last, because this way you can get everything tightly together.
This is how you build slowly until you have all your modules in place, I put 13 together myself and spent 2 days on this, take your time on this. The tighter/straighter they are put together the better it is. If you have measured and delivered everything correctly this should not be a problem as TOSIZE.cz will neatly cut everything to size for you. And so you end up with a set of modules that will form the base of your table.
The Legs
You can choose wooden legs of pine for your modules and cut them to size. But if you want to keep it nice/light, it's better to make them from poplar wood like I did. Choose what the ideal height is for you. This is different for everyone. I made my table quite high at 113 cm. I made my table quite high at 113 cm so that I am at eye level when I look over the layout from my chair. That way you are actually sitting in the model world and not looking down on it. This height includes the adjustable furniture leg of 8cm under the leg so you can level the table nicely. This is also incredibly handy if you want to take your layout to trade fairs. As a result, everything can stand nicely level and the wagons will not move by themselves. It might come in handy if you are going to hilly, but this rarely happens on a model railway.
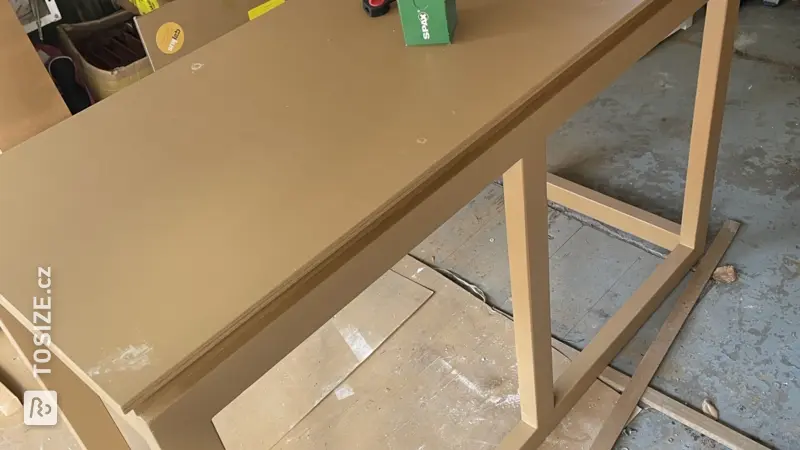
The legs consist of 2 strips of wood with a small board at the bottom forming the base. You then place a furniture leg or other adjustable leg underneath. When measuring your legs, make sure that the shelf on the bottom side has the right dimensions. It is on the underside of the leg. So not on the inside of the bottom, this is not sturdy enough. It is better if the weight leans on the board and not on the screws that hold it in place. Once your order from TOSIZE.cz has come back in nicely packaged. You'll have a whole pile of small boards and even more long boards. Just sort everything neatly into piles so you can orderly and effectively assemble your legs.
What have I used per leg:
- 2x plank for height: 105x5cm 15mm thick
- 1x board for the bottom: 6.5x5cm 15mm thick
Choose a good thickness for your wood, too thin will make things unstable and too weak for your table. Also make sure that the bottom plank fits exactly over the planks of the leg. So e.g. 15 mm for the thickness of 1 board and then add 5 cm for the width of the other board.
We get back to work with the corner clamps and secure the corners neatly after which we pre-drill again and then screw down. You don't have to use 20 screws per leg but at least make sure everything is tight.
Then we assemble the bottom where we secure it with some screws. If you use the same furniture leg as I do, place it slightly in the corner so that 3 screws go into the long boards. For the other hole, be careful not to let the screw come through the board, otherwise you might open up your foot later. You then do this until you have made all your feet and have a whole stack ready to go.
Table construction
Now that you have assembled everything except the table tops, it is time to build. If your design also involves thinking about where the legs should go, you can start placing them. If you are not going to keep tearing down the layout, you can choose to screw things down and then not use bolts. I want to keep my track as flexible as possible so I use bolts. Also pay attention to where you put the bolts if there is another module coming up against it. You don't want to suddenly find out that the bolts are in the way of the adjacent module. Clamp the legs with a glue clamp so that it is firmly in place. When doing this, also make sure it does not protrude above the top of your frame. When you are satisfied with the way it sits, you can pre-drill with a small drill bit and then drill the hole with a 6-mm drill bit. Pre-drilling is really preferable here because you will get better holes than if you start drilling directly with a 6mm drill bit. The nicer the hole is, the better the legs will be fixed. Then insert the bolt with a washer on both sides to protect your wood! You then do this for all your modules until all the legs are attached and you have something like the picture
The next step is to connect the modules together. We use the 8mm bolts for this. Here, I myself used a butterfly nut to secure it. This is because these are easier to loosen by hand. Make sure the modules are properly aligned and the top is nice and flat, then temporarily clamp the bins with clamps so you can drill safely. Drill two 8-mm holes a bit more to the sides as shown in the photo below. Again, don't forget to pre-drill!
Then insert the bolt with two washers and tighten it. You then do this for each module until the modules have become one table. If everything worked out well and the top is still nice and level, we move on to the next step. Cables will run between each module and need to be neatly hidden under the table. To do this, we drill a large hole in the middle of the transition between the modules. I use a hole drill for this. Think carefully about how you want the wiring to run and drill the holes accordingly. Do not make the holes too small because you will always find that you have too little space. Especially if you will be working with connectors between the modules, a large hole is highly recommended. An extra fully charged battery for the drill is then no luxury as it takes a lot of power to make such large holes. Once you have done everything, your table will look something like this
Now, at this point, you have the choice of placing additional guides to help you align the modules properly all the time. Then I hear you thinking guides? Yes these are a kind of furniture pins that you also sometimes come across in folding tables. I myself bought special pins for modelling made for this purpose from a well-known internet giant. These are of somewhat better quality than some you can buy online. Want the very best? Then check out DCCconcepts for baseboard alignment
As you can see from the picture, there are both males and females. Make sure you place them all in the same way so that you can put the modules together in a logical way. I personally used 2 per side of a module. So there are 2 females on one side and 2 males on the other side.
As soon as you start placing them, make sure the modules are properly seated against each other because once they are in place, you can no longer change that. Clamp the modules together with a glue clamp and then pre-drill again, after which you use the right drill bit and have two holes on either side of a module. If you are lucky, the pins (guides) will clamp directly into the hole. It is best here if you first apply a strong contact adhesive to the edges of the pins. I use Bison contact adhesive, which you can buy cheaply at the well-known discounter. This glue dries with half an hour and really glues everything down. So take it off your fingers immediately after placing it because before you know it, those are glued too. When you push the pins into the holes, don't do this with too much force, as you might damage them with the tapping of the hammer. If everything has gone well then it should look something like the pictures below. Now have a cup of coffee because you need to give the glue enough time to dry. It should be half an hour but it's always better to wait a little longer than to do some over.
Once you are satisfied with the result, all that remains is to assemble the tabletops. First put them all down separately and then you can screw them together. Use enough screws so that everything is nicely attached to the frame. If you have used flat-head screws, you will have a nice flat tabletop.
After this you can actually go either way, you can go up on the modules or down as I did.
The important thing is that if you go down like me, you take this into account when designing the table. Everything can be done afterwards, but this often takes much more time and is not nearly as nice as having it neatly cut to size in advance. You may then have to place an extra bolt between the modules because of their size, so that everything stays neatly in place.
Once you've done everything, it's time to sit down with a cup of coffee and enjoy your own work. Made all by yourself with a little help from TOSIZE.cz
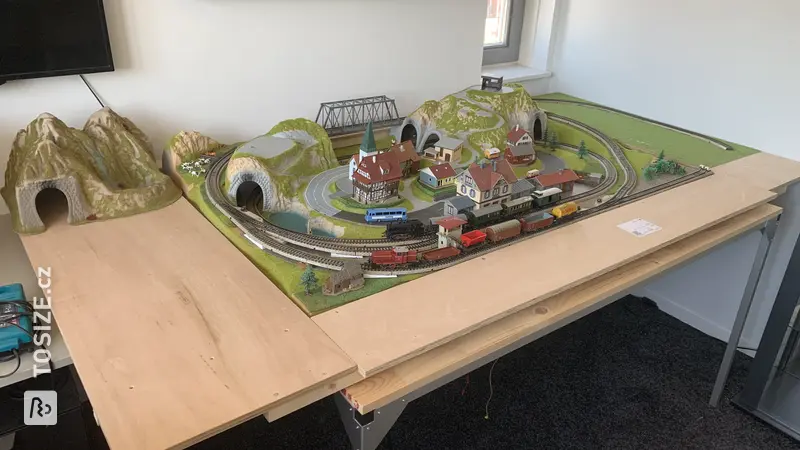
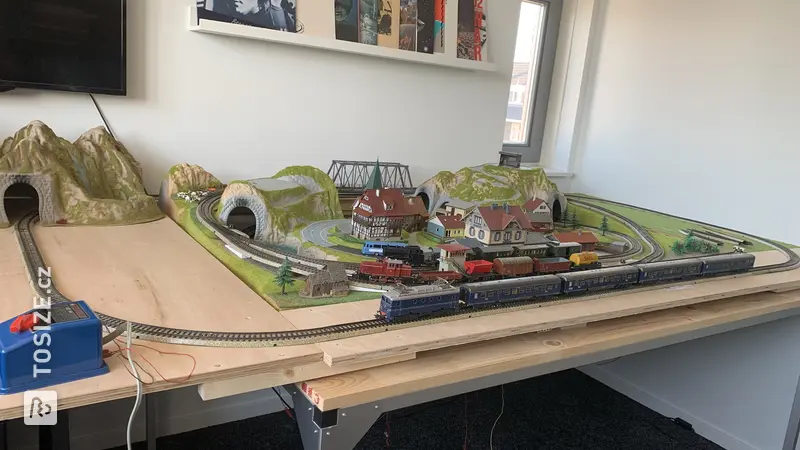
Having enjoyed your well-earned cup of coffee, it is now time to lay the rails and you might end up with something like the pictures below. Here I used 2mm cork for under the rails to create a track bed and a bit of sound insulation. Again, build slowly and neatly because if everything is nice, your trains will run nicely. Don't be satisfied with ‘oh, that's all right there’, no, make sure the track is laid neatly without kinks and you will enjoy it for many years to come and will not be frustrated by trains running out of place. Does this article guarantee that your train layout will run smoothly? No, you will always have a wagon that is sulky or a carriage with a bad bogie causing them to run out. But if you work accurately with the steps in this article, you will be assured of a good start and know it's not down to your modules. Then don't forget to enjoy your project and always check that everything is lying/connecting nicely flat.
Now all that remains is many years of building your own world in miniature...
Tip! Also check out our handy DIY tips!
What now?
Want to make this DIY project? Check out Reinder's saw list and complete your order easily.
CZK 4,580.30
All materials used
View all sheet materials
